Inspiration Interview: Lindsay, The Happy Herbivore + Thai Crunch Salad Recipe

lindsay-nixon-light-and-leanWelcome to the newest feature on The Laughing Medusa, The Inspiration Interviews. Through this series, we’ll get to hear from inspiring X who and that wonderful adventures await those who aren’t afraid to chase their dreams.

To kick off the series, I’m so glad to have Lindsay Nixon here as part of her pre-release blog hop book tour. I’ve been following her blog (and devouring her delicious recipes!) for over five years now. Her first cookbook, The Happy Herbivore, is my go-to when I’m looking for a healthy, easy, and delicious meal. If you’re looking to incorporate more plant-based foods into your diet, I highly recommend Lindsay’s recipes. Plus, they have the added bonus of being low fat and made from simple, ‘everyday’ ingredients. Lindsay has an inspiring story to share, moving from lawyer to self-made cookbook author in order to pursue her passion and make the world a healthier place. Plus, she’s even sharing one of the recipes from her new cookbook, Light & Lean with us today. 

What did you want to be when you were young? What unconventional career path brought you from there to here?
When I was very young I wanted to be a veterinarian because I assumed that meant I got to play with animals all day. As I got older I leaned more towards becoming a doctor and then a lawyer. Both of those careers were attractive to me because I had this deep desire to help people and saw those careers as a way to do it. My parents will tell you they thought I was going to grow up and be a writer because I loved writing short stories and poems as a child (I also had a very active imagination!). I ended up becoming a lawyer, and a lawyer who represented doctors and hospitals no less! Although I was truly helping my clients, I never felt satisfied. I just wasn’t happy so I eventually left the law to build my company, Happy Herbivore Inc. I get to help people every day AND I get to write! SO I guess my parents were right in the end! (If you want to learn more about my unconventional journey check you my “exit strategy” blog posts on happyherbivore.com or sign-up for the free video series – I go into my own story in the first video).
happy-herbivoreWhat inspires you?
People taking steps towards living better. I’m always flattered when my fans tell me I inspire them… because they inspire ME.

What advice would you give to someone looking to transition to a plant-based diet?
Just do it. Make the next thing you put in your mouth a plant food. Take it a meal at a time. Don’t worry about Thanksgiving in a month or a wedding next year. Cross that bridge when you come to it. And I promise you’ll be fine. Focus right now on the next meal. And get junk out of the house!

How would you sum up your personal philosophy?
Live better.
thai-crunch-salad-7323_CMYKThai Crunch
Single serving
Gluten-free, Quick, Budget, Single Serving

Before I was plant-based, I loved the Thai Crunch salad at California Pizza Kitchen. I finally decided to re-create a lighter vegan version of it for this cookbook. It’s easy, fresh, fast, and satisfying. (I also loved their Original BBQ Chicken Chopped salad, hence my BBQ Salad [in full cookbook] recipe!) By the way, CPK is one of the vegan-friendliest restaurant chains in the US. They have a PDF online indicating which menu items are suitable for vegans and vegetarians.

4 c napa cabbage, red cabbage, or lettuce (or a combination)
1 carrot, julienned
2 green onions, sliced
¼ – ½ c edamame
½ cucumber, sliced or diced
Thai Peanut Dressing
crushed peanuts (optional garnish)
cilantro (optional)
lime wedges (garnish)

Toss cabbage/lettuce, carrot, green onions, edamame, and cucumber together in a salad bowl, then top with Thai Peanut Dressing, crushed peanuts, and cilantro (if using), and garnish with a lime wedge. (I also love squeezing fresh lime juice over the salad.)

Chef’s Note: For a soy-free version, substitute chickpeas for the edamame.

lindsay-nixon(via)

Thai Peanut Dressing
Makes ¼ cup
Gluten-free, Quick, Budget, Pantry
Creamy, delicious—here’s a lower fat and lower calorie DIY peanut sauce.

1 tbsp smooth peanut butter
1 tbsp warm water
1 tbsp sweet red chili sauce
juice of 1 lime wedge
2 tsp low-sodium soy sauce or gluten-free tamari
1 ¼ tsp rice vinegar
garlic powder
ground ginger
1–2 drops Asian hot sauce (e.g., Sriracha)
1 tbsp nondairy milk

In a small, microwave-safe bowl, add peanut butter with water, chili sauce, lime juice, soy sauce or tamari, rice vinegar, a few dashes of garlic powder and ground ginger, plus hot sauce. Microwave for 10–20 seconds (so peanut butter is melty), whisk into a sauce, and then whisk in nondairy milk. Taste, adding more hot sauce as desired.

Chef’s Note: For a richer sauce, substitute coconut milk for the nondairy.

Thanks so much, Lindsay! I can’t wait to try the Thai Crunch Salad; it’s right up my alley. If you’re already a Happy Herbivore fan, what’s your favourite recipe? If not, you’ve got some serious catching up to do.

signature

The Secret to Making Perfect Kale Chips Every Time

IMG_8558 copyThis post isn’t exactly revelatory – any food blog addict has read approximately one zillion posts about these crunchy green bites o’ love. But sometimes friends or family try making them and complain that they’re soggy or burnt or otherwise disgusting. Maybe you’ve had that problem too and I’d hate for you to not have this delicious snack in your life. So here’s my little kale chip secret…

Kale chips are easy. Anyone can make them. But they do take a little bit of love.

So here are my tips for making kale chips that are crispy, perfectly seasoned, and still a little green… every time.

IMG_85651. You can make your kale chips any flavour you like (dill pickle, spicy curry, or, cheesy perhaps?) But I’d recommend keeping it simple the first few times. A head of kale, olive oil, a lemon, and salt are all you need.

2. Tear your kale off the stem and into chip-sized pieces (some will be smaller, thats okay).

3. Make sure your kale is very dry – use a salad spinner or leave it to air dry in a colander.

4. Measurements will vary depending on how big your head of kale is. Start with 1/2tbsp each of lemon juice + oil and a 1/4tsp of salt. Add more as needed.

5. Get your hands in the bowl and massage your kale so that its all evenly covered.

6. This is probably the most finicky part: Lay your kale out in a single layer on baking sheets. Make sure none of it is folded over or overlapping another piece.

7. Bake at 250 degrees. It’s tempting to crank up the heat so that you can eat these babies sooner but don’t. It’ll be worth the wait, I promise. They’ll probably take about 30-40 minutes (I generally check them after 20 and every 10 minutes thereafter). When they’re all crispy take them out and transfer to a bowl.

IMG_8568Tada! Perfect kale chips. It’s true – it takes a little bit of patience, but if you follow this formula you’ll be chowing down on a delicious, crispy, salty snack that just happens to be a big bowl of greens. Double win!

Have you tried making kale chips before? Do you have a favourite flavour combination?

signature 

Enter daily for your chance to win!
EmmaDeer's27thBirthdayBash

pineapple mango gazpacho.

It might seem strange to eat a chilled soup for dinner when it’s snowing outside, and to make a meal made of tropical fruits when the sun has barely shown its face that day. But that’s exactly what I did last night. I’d been at work for 12 hours straight, pulling things together for our upcoming issue and finalizing details for the event we’re hosting on Wednesday. When I got home, I needed food. Fast.

I tried this gazpacho while completing the Clean Program (I’ll post a proper recap soon). With a few modifications to suit my tastes, it’s quickly become a favourite of mine. The sweet, salty, and spicy flavours go so well together. Plus, it’s always nice to have meals you can make in a matter of minutes. If you’re looking something for simple and delicious to have for dinner tonight, I would give this a try.

pineapple mango gazpacho

1 cup chopped pineapple (fresh or frozen)
1 cup chopped mango (fresh or frozen)
1 cup baby spinach
1 avocado, diced
1 jalapeno pepper, seeded and chopped
2 tbsp coconut milk or water
juice of 1 lime
salt to taste

1. Blend pineapple, mango, spinach, jalapeno pepper, salt, lime juice, coconut milk, and half of the avocado until smooth.
2. Pour into bowls. Garnish with other half of the avocado. Optional garnishes include sprouts, cilantro, and extra fruit.

Serve chilled. Because of the avocado, you want to eat this as soon as possible after making.

Easy peasy, right? And oh so tasty! This is quite a light dish, so you might want to try eating it with a cup of your favourite grains. While I was cleansing, I usually found it was a all I needed in the evening but I know some people might want a bit more satiety.

Don’t you think this would make the perfect accompaniment for dinners on warm summer nights? I can’t wait!

What did you have for dinner? If you have any healthy meal ideas that come together in a few minutes, I’d love to hear them! I’m definitely going to be short on time for the next couple of months, but I’m determined to stay on track with eating clean.

xoxo
S.

vegan holiday treats from scratch.

I eat a primarily vegan diet. However, with the exception of meat, I do eat other animal products in moderation. There are some foods I absolutely will not eat though, mostly because I don’t think they should be classified as food. High fructose corn syrup, for example. I don’t want that stuff in my body, period. Same goes for the aluminum in most baking soda, the cellulose (aka wood pulp) common in many processed foods, etc. etc. Because of this, making most of my food from scratch becomes really important. Plus, my younger brother is lactose intolerant and has a number of food allergies. So, this Christmas I’ve whipped up an array of vegan goodies from scratch. So far I’ve made:

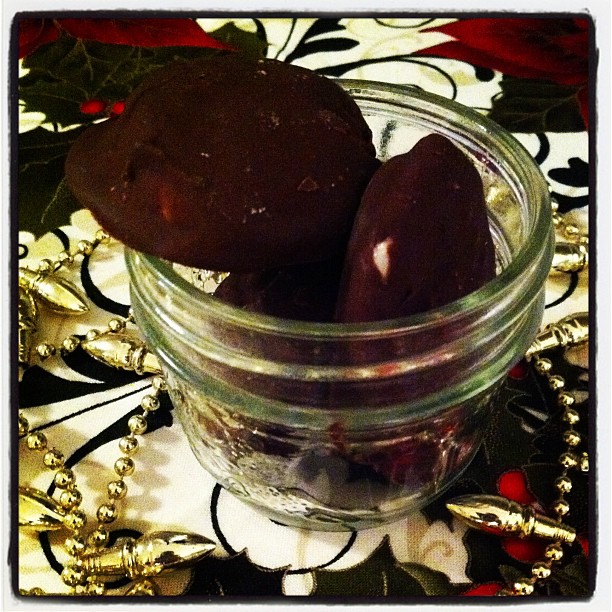
These peppermint patties from How it all Vegan, which are bang on. I got an organic, pure peppermint extract (no propelyne glycol here!) so the peppermint flavour is a lot more natural, which I like. My patties might not be as beautiful as Sarah and Tanya’s but they taste much like a traditional York patty. Yum!

I found organic candy canes at Essence of Life Organics (my fave!) and made vegan white chocolate from scratch to replicate a personal childhood favourite: candy cane bark. This was my first time making white chocolate and I think it has more of a distinct cocoa butter taste than what you usually get an the store, but I really like it.

My mom was down last weekend and I sent her back with a few of my butterscotch cashew cookies for my brother. The next day she sent me an e-mail that said: “Heath is in love with those cookies.  He keeps opening the jar just to smell them.” I told you they’re good! I figured I’d better make some more for Christmas.

Peanut butter fudge babies are so quick to whip up and they’re such a decadent treat. I think fudge babies alone make it worthwhile to have a food processor.

I’ve also promised to whip up a batch of Twix or Treat Fingers from OhSheGlows. I made this when Angela first posted them and they are fantastic.

With the exception of the cookies, these treats are all incredibly sugar-laden. They’re not the kind of thing I’d eat a lot of year-round, but I’m a firm believer in indulging over the holidays. And one bite proves that eating vegan doesn’t mean making sacrifices to taste.

What are your favourite holiday treats? Do you have plans to make anything special?

xoxo
S.

Photos taken with Instagram for iPhone.

only the best cookies ever!

When my mom came to visit in October we stopped in at Mylk Uncookies on our way home from a trip to Riverdale Farm. I’d been anxiously anticipating sampling their vegan treats for months so we sat down with a chocolate peanut bar and lucuma macaroon to share. I was so impressed with the sweet, delicate taste of the macaroon that I set out to replicate it at home the very next week.

What I came up with was not the dense macaroon that I’d tried at Mylk Uncookies. It was even better. The result was the best tasting cookie I’d tried in a long time. As they baked, my apartment was filled with a familiar scent – the sweet, fragrant aroma of the butterscotch brownies my mom had made when I was growing up. The big difference is that every ingredient in these cookies is healthy. They’re 100% vegan and if you have a dehydrator you can make them raw as well. Here’s the recipe:

butterscotch cashew cookies

1 cup cashews
1 heaping cup shredded, unsweetened coconut
1/4 cup agave nectar
2 heaping tbsp lucuma powder
1/4 cup melted coconut oil
1 tsp vanilla extract
a pinch of salt

1. Put cashews in your food processor and pulse until a coarse meal forms.
2. Add the remaining ingredients and process into a dough.
3. Spread dough 1 inch thick on a parchment paper lined baking  sheet. Cut into squares.
4. Bake at 300 degrees for approximately 20 minutes or until tops are golden brown and cookies are crunchy.

Everyone I’ve offered these babies to has asked for the recipe, so I know I’ll be making a few batches over the holidays. If you give them a try yourself, please let me know what you think.

Bon appetit!

xoxo
S.